

Savory Halloween Snacks & Sweet Treats to Make at Home 🎃
Make cheese broomsticks, a pumpkin cheese ball, spooky dips, cookies, and cupcakes. Choose Halloween snacks by the cooking, chilling, and decorating involved
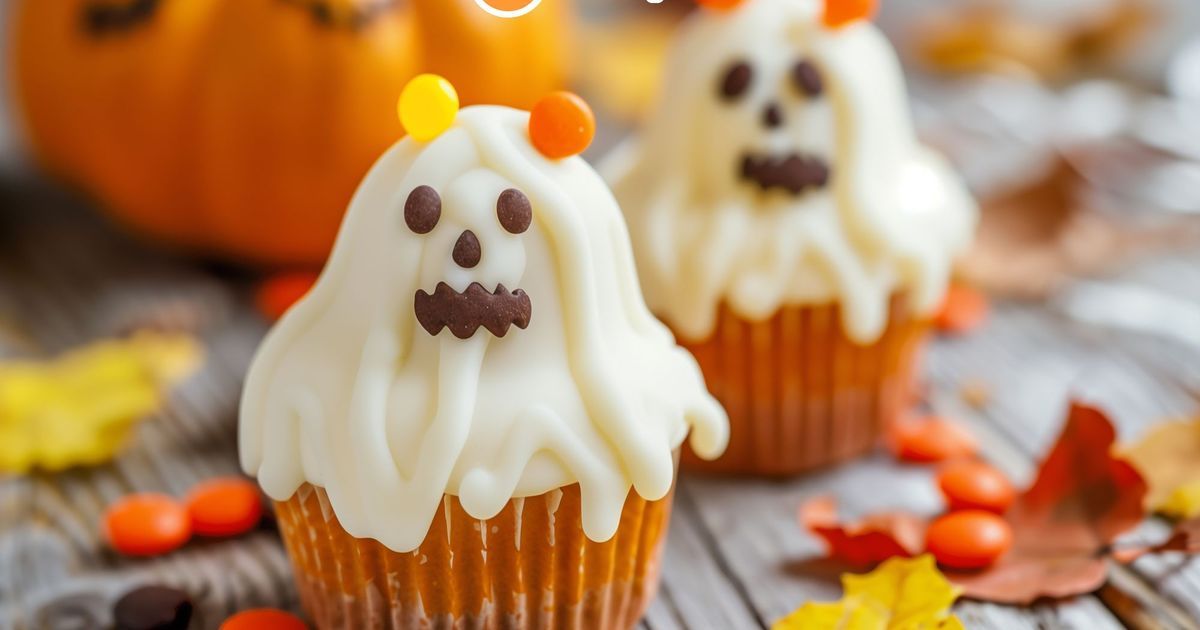
For savory Halloween snacks, turn string cheese and pretzels into witches’ broomsticks, shape a cheddar cheese ball into a pumpkin, or serve green avocado dip beside warm croquettes. For something sweet, choose green marshmallow monsters, chocolate popcorn balls, coffin-shaped jam sandwiches, spider cookies, or cupcakes topped with Oreo bats.
These Cookpad community recipes use everyday ingredients to create the Halloween effect through shape, color, and texture. Choose by the work involved: some need only assembly, while others require cooking, chilling, or decorating each piece.
Choose your Halloween snacks by the preparation involved
An easy design can still need time to chill or set. Decide which kind of preparation fits your day before choosing a recipe:
-
For assembly without cooking: try Halloween broomstick snacks or Halloween sandwiches, such as the coffin-shaped jam sandwiches below. Their Halloween shapes come from cutting and arranging the ingredients.
-
To keep the oven free: choose a pumpkin-shaped cheese ball from these Halloween cheese ball recipes, or make chocolate popcorn balls using our Halloween popcorn recipes. The cheese ball needs refrigerator time; the popcorn balls need melted chocolate and time to set.
-
For a warm savory snack: pair croquettes and sausages with Halloween dips, such as the green avocado dip below. Prepare the dip while the packaged foods cook.
-
For less individual decorating: try sugar cookie bars from our Halloween cookie recipes. Frost the cooled slab, then cut it into portions.
-
For a decorating project: shape zombie cookie faces, pipe chocolate spider legs, or make Oreo bat toppers for Halloween cupcakes. Allow for shaping, cooling, and finishing as well as baking.
Savory Halloween snacks to make at home
Cheese, eggs, pretzels, and dips give you a savory alternative to candy and frosted bakes. The recipes below create different effects: a recognizable shape, a marbled surface, a pumpkin-colored centerpiece, or a playful dipping platter.
Cheese broomsticks with crunchy pretzel handles
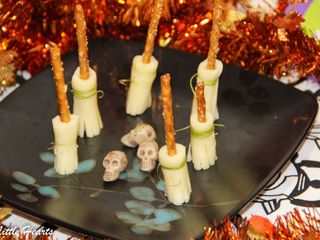
Little Hearts’ Cheesy Witches’ Broomsticks use mozzarella string cheese, mini pretzel sticks, and an optional tie of chives or thinly sliced green onion. The creamy cheese and crisp pretzel give each small broom a contrast in texture.
The recipe makes six broomsticks from three cheese sticks. Cut each cheese stick in half, then cut strips into the bottom of each piece to create the bristles. Leave the top intact so it can hold the pretzel handle. This is the assembly-only savory choice when you want a Halloween shape without baking or piping.
For more versions, browse Halloween broomstick snack recipes.
Pesto deviled eggs with a marbled Halloween effect
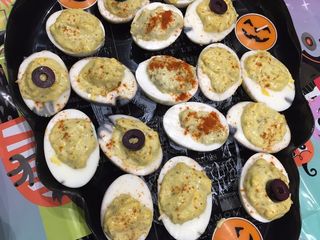
Becky’s version mixes the cooked yolks with green pesto and mayonnaise, then finishes the filled halves with paprika and sliced black olives. The pesto changes both the color and flavor of the filling; the olive adds a briny topping.
The marbling happens before filling: the recipe colors the cracked shells of cooled, hard-boiled eggs before peeling them. Follow the author’s illustrated steps for that stage, then halve and fill the eggs. These are a different decorating project from cutting individual olive spiders, so choose them if you prefer a colored surface and a simple topping.
For other decorating styles, explore Halloween deviled egg recipes, including spiders, owls, and other themed toppings.
A pumpkin cheese ball with a cheddar-and-chip coating
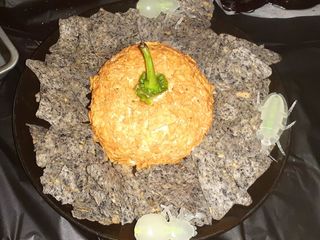
Danielle Barnes’ Pumpkin Cheese Ball combines cream cheese and cheddar with onion, cumin, salsa, and jalapeño. Cheese-flavored tortilla chips create the orange coating, while a bell pepper stem makes the pumpkin shape recognizable. It looks like a pumpkin; the recipe doesn’t contain pumpkin flesh.
This is a shared appetizer rather than an individually portioned snack. Allow at least two hours of chilling after shaping, and add the crushed-chip coating when serving, as the recipe directs. Set out the accompanying chips so guests can scoop some of the creamy center with the crunchy coating.
For other shapes and flavor combinations, explore Halloween cheese ball recipes. Check the ingredients when choosing: the results include sweet versions as well as savory ones.
“Zombie guts” dips with warm croquettes and sausages
Carriecooksbest’s dipping platter pairs potato croquettes and sausages with mashed avocado and tomato relish. Lime and chili season the green avocado dip, while the relish adds a red contrast. Here, the Halloween effect comes from the colors, serving arrangement, and broken sausage pieces rather than intricate decoration.
Cook the croquettes and sausages according to their package instructions, preparing the dips while they cook. The five-minute time listed for the dip doesn’t cover the whole platter. Choose this when you want warm bites with something to dip them into, and account for the cooking time of the products you buy.
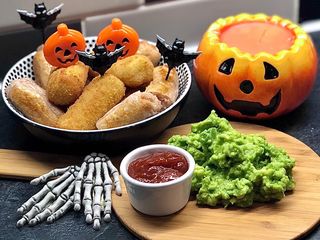
For more dipping ideas, browse Halloween dip recipes, from pumpkin hummus to spiderweb guacamole.
No-bake Halloween treats
These sweet options keep the oven free. The marshmallow monsters need stovetop melting and time to rest; the popcorn balls need melted chocolate and chilling. The coffin sandwiches are made entirely by cutting, spreading, and assembling.
Green marshmallow monsters with candy eyes
Mish’s Monster Marshmallow Rice Krispy Treats combine crisp rice cereal with melted butter and marshmallows. Green food coloring and candy eyes turn the sticky mixture into small monster faces without baking or making separate cookie dough.
Let the mixture cool enough to handle before shaping it with greased palms, following the author’s steps. Gently flatten the portions and press the eyes into place. Allow for the 30-minute rest at the end of the recipe as well as the melting and shaping; the listed 20 minutes isn’t the full time until serving.
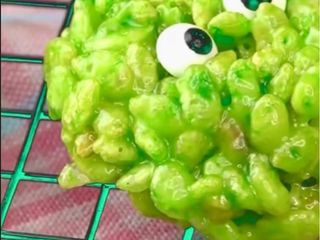
For different flavor combinations, explore Rice Krispie treat recipes. The results include everyday and other seasonal versions, so choose a base that suits the Halloween decorating project you have in mind.
Chocolate popcorn balls with Halloween sprinkles
Fenway’s popcorn balls use white chocolate for one batch and semisweet chocolate for the other. Halloween-colored sprinkles bring the theme without a separate decorating step for every piece.
The recipe uses lined muffin cups to shape the portions: divide the coated popcorn between them and press gently. This gives you a practical way to form the balls without making each one freehand. Allow about 30 minutes in the refrigerator to set before unmolding; the listed preparation time doesn’t include that whole wait.
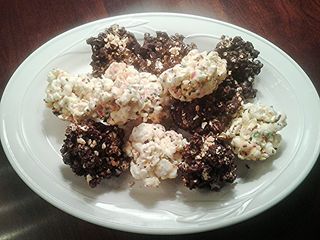
For other coatings and mixes, browse Halloween popcorn recipes. Follow the method for the version you choose rather than assuming every coating sets in the same way.
Coffin-shaped sandwiches with a red jam filling
Mish’s Coffin Sandwiches turn white bread and strawberry or raspberry jam into a sweet Halloween snack. The red filling shows between the bread layers, with small pieces of carrot or cheddar arranged as a cross on top.
Trim and shape the bread before filling it, following the step photos for the coffin outline. The recipe makes four sandwiches, so it’s a useful option for a small gathering or a simple themed snack at home. Keep it in the sweet part of your selection: the cheese is an optional decoration, while the filling is jam.
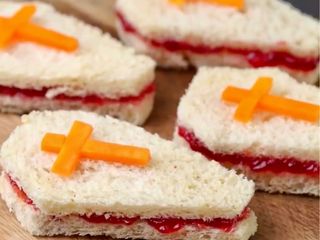
For more shapes and fillings, explore Halloween sandwich recipes. The results include both sweet and savory options.
Halloween cookies, bars, and cupcakes
Choose a bake according to how you want to decorate it. Zombie cookies build the faces into the dough; spider cookies add chocolate details after baking; bars are frosted as a slab; and cupcakes combine frosting with cookie toppers.
Zombie cookies with faces made from dough
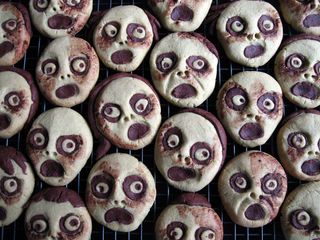
Hiroko Liston’s Zombie Cookies use pale and cocoa-colored dough to create eyes, mouths, and shadows. Optional matcha colors the lighter dough, while a brush of cocoa mixed with water makes the faces look more weathered.
This is a hands-on shaping project rather than a plain cookie finished with sprinkles. Press the small dough features into place as the author directs so they stay attached. Allow time to make the faces before baking; the oven time alone doesn’t describe the work involved. Choose these if the decorating itself is part of the activity you want to enjoy.
Peanut butter spider cookies with chocolate legs
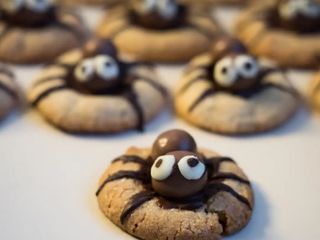
Sneha Patel’s Spooky Spider Cookies start with a peanut butter cookie base. Mini chocolates form the spiders’ bodies, piped melted chocolate creates the legs, and candy eyes finish the faces.
Let the baked cookies cool completely before adding the chocolate decorations. The recipe then gives the decorated cookies a short refrigerator rest to help the details set. A piping bag or a small food bag with a corner cut off helps you draw the legs. These contain peanut butter, so keep that ingredient clear when describing the cookies to anyone choosing what to eat.
For more shapes and decorating styles, explore Halloween cookie recipes. Choose one that suits the tools and time you have, whether you want to shape dough or decorate a baked cookie.
Frosted sugar cookie bars to slice into portions
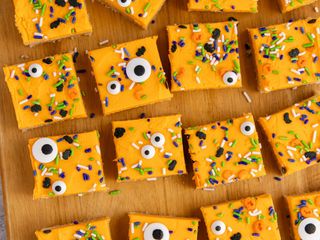
My Rad Kitchen Eva’s Halloween Sugar Cookie Bars are baked in an 8-by-8-inch pan and finished with butter frosting, optional orange coloring, and Halloween sprinkles. You decorate the surface together, then slice it into individual servings.This is the practical alternative to shaping or decorating every cookie separately. Let the base cool before spreading the frosting; the recipe also offers chilling for cleaner cuts. Its listed time covers roughly the baking stage, so allow additional time for mixing, cooling, and frosting before you plan to serve the bars.
Chocolate cupcakes with Oreo bat toppers
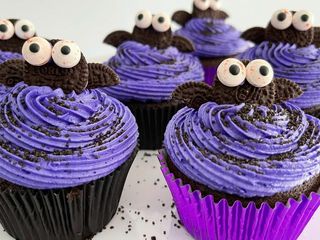
Sneha Patel’s Spooky Cupcakes combine chocolate cupcakes, buttercream, and small Oreo bats. Halved cookie pieces become the wings, with melted chocolate helping attach the pieces and candy eyes.
Treat these as three tasks: bake and cool the cupcakes, make the frosting, then assemble the toppers. The recipe yields 18 cupcakes, so the repeated finishing work matters as much as the baking. Add the frosting only after the cakes have cooled completely, and follow the topper steps before placing the bats on top. Choose this recipe when you want a more detailed sweet centerpiece.
For other characters and flavors, browse Halloween cupcake recipes. Check both the cake and topping ingredients if you’re choosing for a particular dietary need.
More Halloween ideas from Cookpad
Taking one snack to a gathering is different from planning the whole spread. For combinations, preparation plans, and drinks, use our Halloween party food ideas, menus, appetizers, and drinks.
If you’re also carving a pumpkin, keep the fresh ingredients you set aside for another cooking project. Our guide to using your Halloween pumpkin’s guts, seeds, and flesh explains which parts to cook and when composting is the better option.
Made one of these snacks? Find out how to share a Cooksnap, then add your photo on the recipe page to show the author how it turned out.
Have a Halloween snack of your own? Share your recipe on Cookpad and help another home cook bring a little Halloween creativity to the kitchen.